-
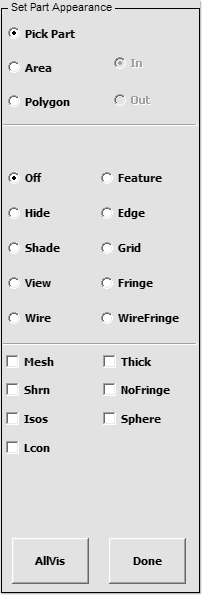
- Figure 1 – Appear Interface
Purpose:
The Appear interface is used to change the appearance of selected parts. This information can be saved using the Save/Retrieve Views interface.
There are certain “global” plotting modes available in the 2 rows of rendering buttons located on the bottom edge of the graphics viewport like Hide, Shad, View, etc… And these are applied to all parts in the model. In contrast, the Appear interface allows users to change plotting modes on a per part basis. This allows for entire model being in edge mode except one part in fringed mode – thus allowing user to compose a display that can help the audience to focus on the part of interest
Another very important feature of this interface is to display and animate very large models using edge mode for most parts except for some of particular interest and yet have reasonable animation speeds.
Controls:
 Pick Part – Assign appearance by part
 Area – Assign appearance to parts inside/outside a user defined area
- Polygon – Assign appearance to parts inside/outside a user defined region
- In – Set parts inside the area/polygon
- Out – Set parts outside the area/polygon
- Off – No change to the part display mode
- Hide – Display part(s) with hidden line removed
- Shade – Display part(s) in shaded mode
- View – Display part(s) in non-shaded color mode
- Wire – Display part(s) in wire frame mode
- Feature – Display part(s) in feature line mode
- Edge – Display part(s) in edge line mode
- Grid – Display part(s) with grid points
- Fringe – Display part(s) with fringe
- WireFringe – Display part(s) with mesh fringe
 Mesh – Toggle mesh outlining on/off with shad and fringe
 Shrn – Toggle shrink plot on/off
- Isos – Display part(s) with iso-surfaces
- Lcon – Display part(s) with line-contours
- Thick – Display thin shell part(s) with thickness
- NoFringe – Display part(s) from fringe calculations
- Sphere – Display solid part(s) as spheres
Assign appearance to all visible parts
Exit Set Appearance interface
